
Besides the 1-Click Geotagging there is another geotagging mode available in myTracks. The workflow looks different. The photos are not automatically synchronized with the tracks but they are put into a pool first. Then you have the full control over time zone, time correction, etc. For each single photo you can decide how the geotagging has to be performed (previous track point, next track point, interpolation, etc.).
In the preferences dialog on page General please select Extended assignment using pool of photos for Geotagging Mode if you want to use the extended geotagging mode. After importing photos the pool of photos looks like that:
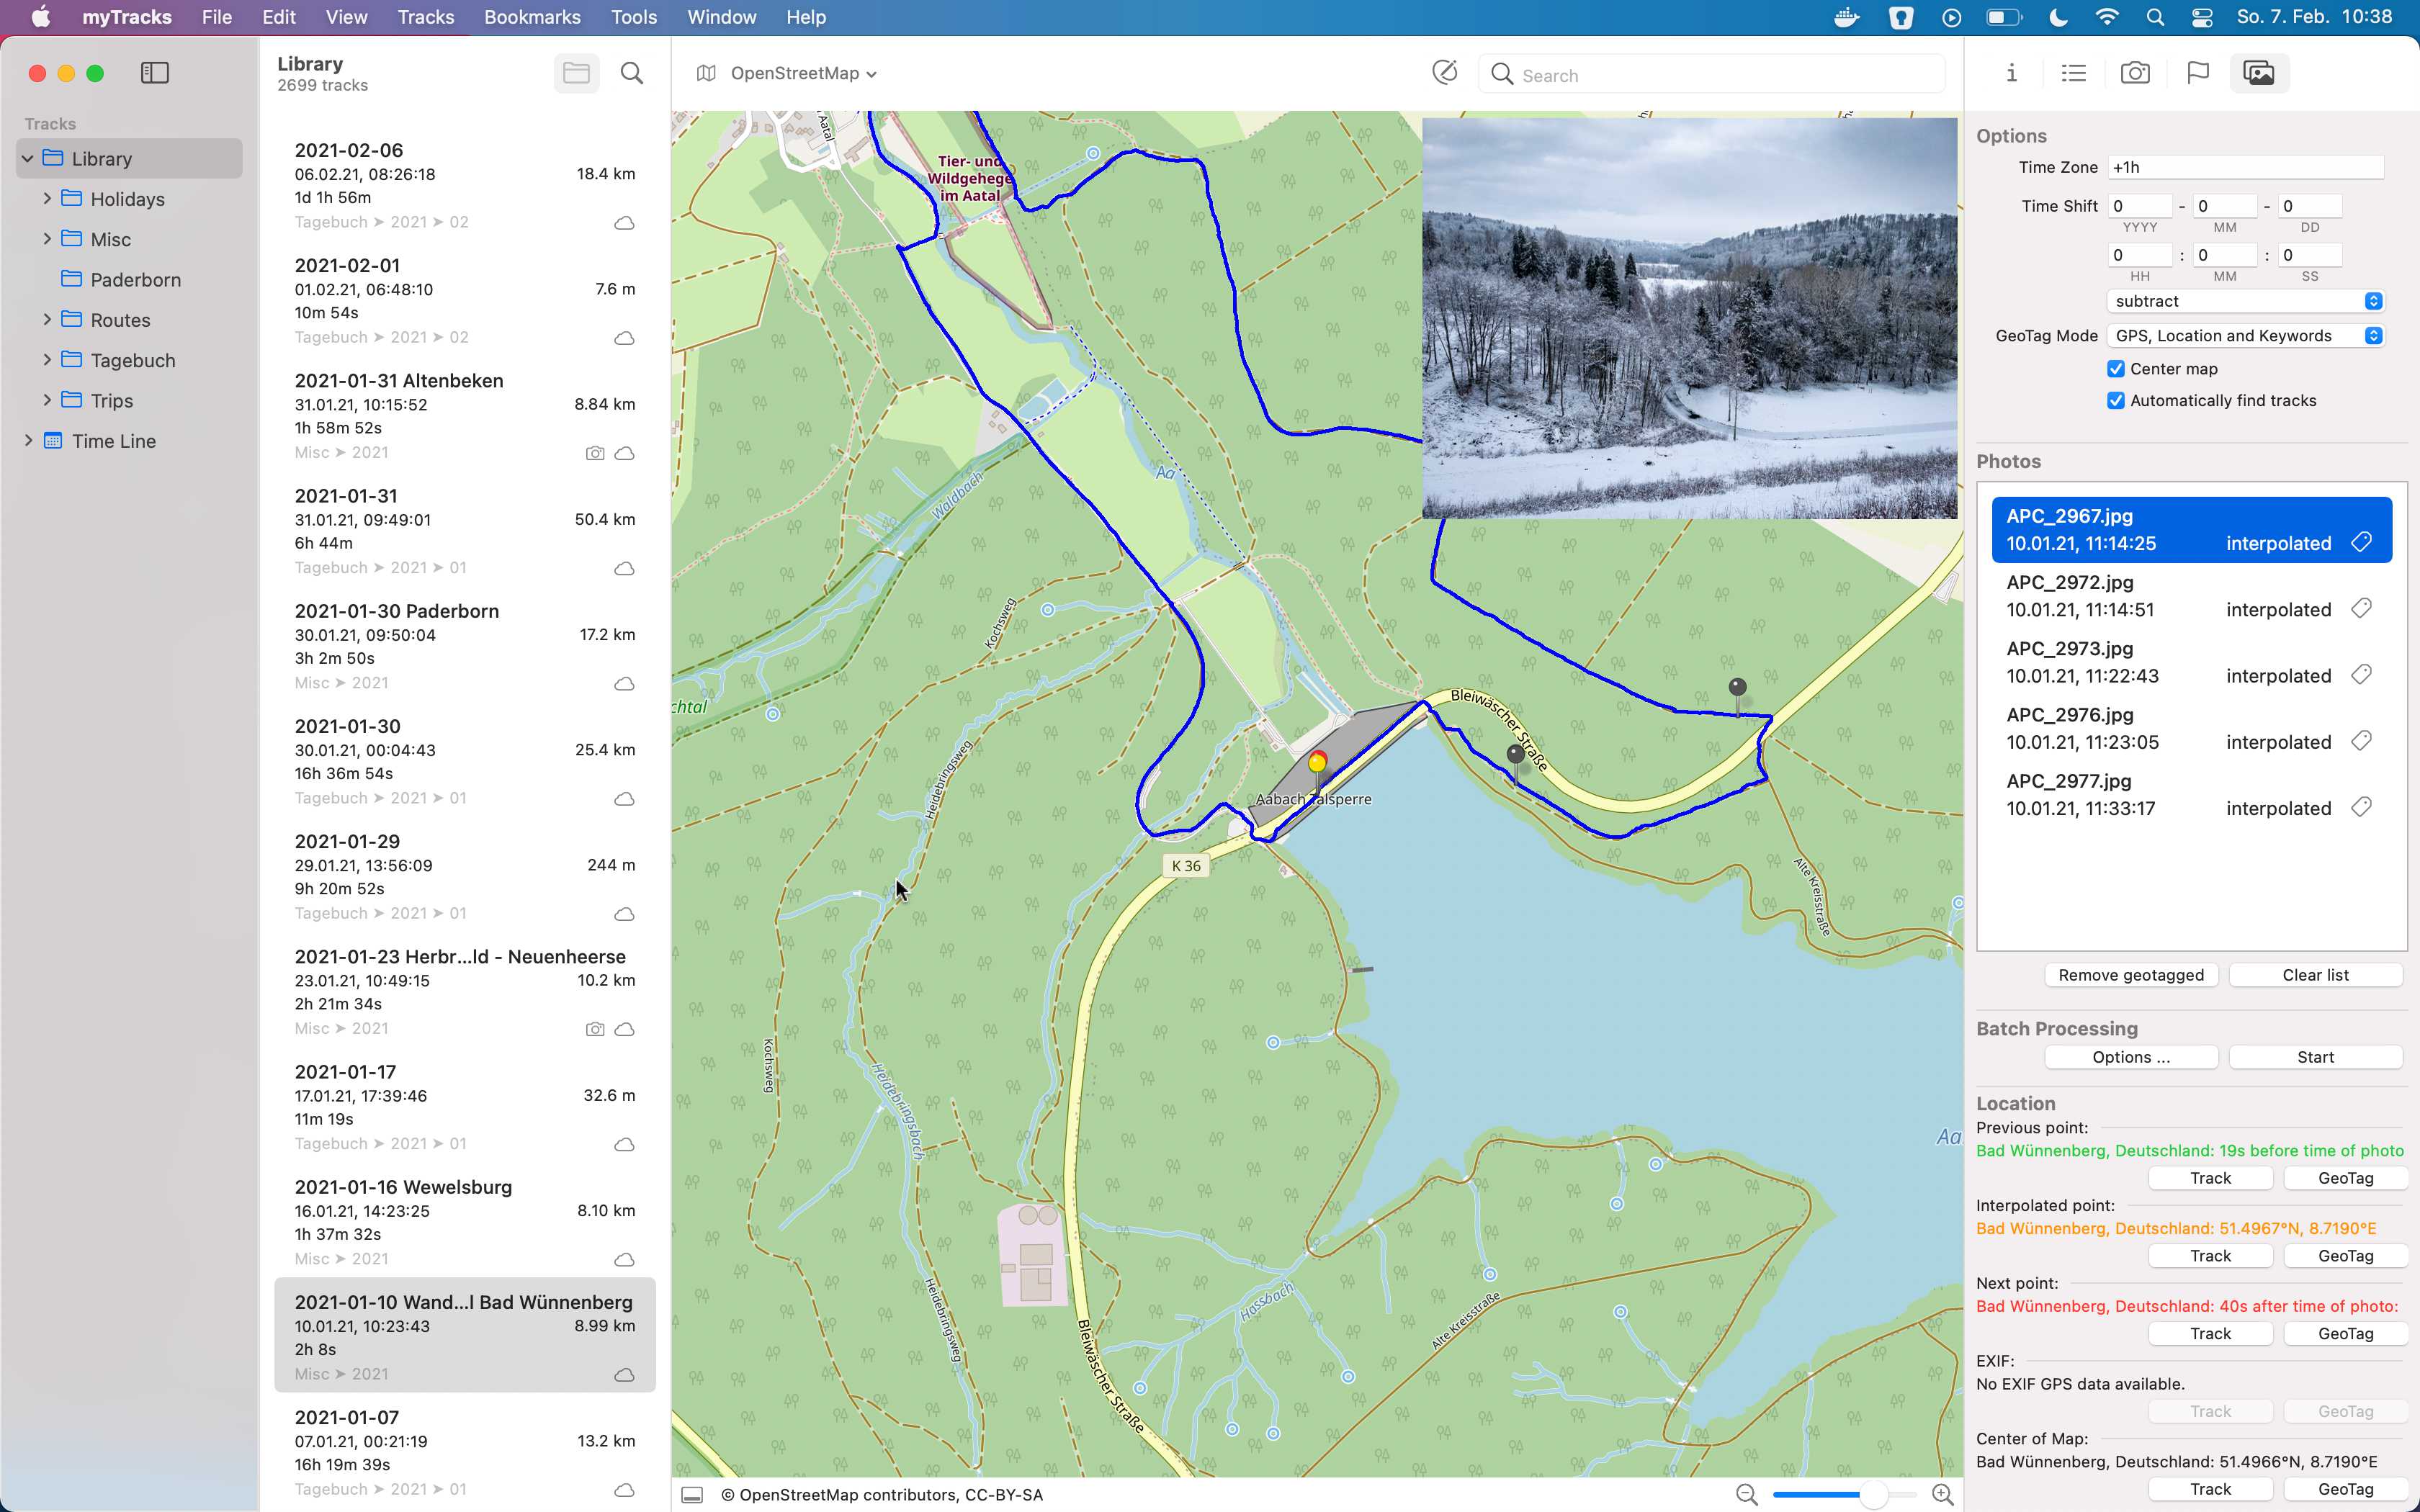
You can change the time zone of the photos in the upper section and you can specify a time correction in the line below if the clock of your camera has not been set correctly for example.
A list of all imported photos is shown in the Photos section. Each entry in the list contains the filename and also the corrected timestamp of the photo.
When you select a photo the following steps are performed:
In the Location section you find subsections for previous point, interpolated point, next point, EXIF and center of map. The first four subsections correlate with the four colored pins mentioned before.
Each subsection contains two buttons:
The following screencast (no audio) shows how to work with the pool of photos:
Even if you work with the pool of photos you can use an automatic mode (batch processing). First, you have to specify the rules for the batch processing. Click the Options... button to open the following dialog:

Here you can define when and how a photo is assigned to a track point. For example, you can specify that a photo should be assigned to the closest tracking point if the time span to this tracking point is below the defined limit value.
The list of photos shows batch information as shown in the following screenshot:

If the batch symbol is visible (as it is the case in the screenshot) this photo will be processed by the batch mode. To the left of the batch symbol you see how the location will be calculated (interpolated in the example).
Click the Start button to perform the batch processing. After clicking the button a dialog will appear asking for the batch mode. Now you can decide whether the photos will be assigned to the track (click Track) or the EXIF tags are written directly to the files (click GeoTag).
The following screencast (no audio) shows the automatic assignment using the pool of photos:
Sometimes it happens that the clock of your camera was not set correctly. In that case you have to specify the time difference between the camera clock and the GPS clock. You can do that manually by modifying the time shift values. But it is much simpler with myTracks drag & drop mode. Just select a photo where you know the exact location. Then drag that photo to the map. myTracks will search for the track point nearest to the mouse pointer and automatically calculates the time correction. The calculated locations of all other photos are also calculated and shown as grey pins on the map. If you have found the correct location drop the mouse button. Afterwards you should check the time correction by selecting some other photos. If the time correction is not yet correct you can either modify it manually or just drag & drop a photo again.
The following screencast (no audio) shows the time correction using a reference photo: